Tuesday 30 September 2014

Hello!

Hello, hello! It's Jessie here, aka Messy Jesse as I'm known from my blog! This is my very first guest post on the Sizzix blog today! I'm so excited to be part of this fantastic and talented community. I had the pleasure of visiting the Sizzix base here in the UK over the summer and it was a brilliant day out in North Wales, meeting the team and getting to grips with all the dies and machines! There was lots of time for playing and chatting about all things Sizzix ...


We all appreciated the kitchen sign ;-) I think I need this for my sewing room ...


… And of course seeing some of the lovely projects cooked up by Angela, she's so inventive! 


So shall I tell you a little more about myself? OK great. I.love.sewing. Literally love it! For the most part I'm a quilter but I do enjoy making soft toys and the odd dress-making project when I can find the time. Most of the time you will find me here …


… in my sewing room! ah it's just heaven working in here. Can you tell I have an addition to mini quilts? (there's more added since this photo was taken!) I've always been creative for as long as I can remember, but picked up sewing in my late teens - after dabbling with projects here and there I finished my first quilt in 2011 and haven't stopped since! 

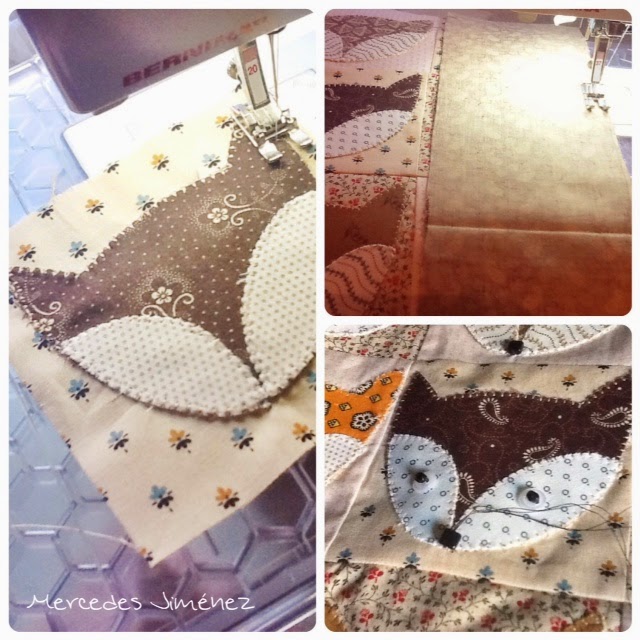
I have a real passion for the traditional technique of English Paper Piecing (EPP). So I usually have a bigger quilt project in the works as well as a small EPP project on the go at all times. One of the reasons that I was drawn to Sizzix was the opportunities to use the dies for EPP - so I'm really excited about eliminating cutting time using my new dies! 


My style of quilting is heavily influenced by vintage and antique quilts from the 1920s/30s as well as earlier quilts in the 1800s. Those classic blocks and bold colours always look so fresh to me. When I'm not sewing, I'm running my online fabric and quilt shop; Sew and Quilt! I write for my blog, I do some editorial sewing projects for books and magazines, I also have a day job + a saturday job (saving for our wedding next month, eek!) and love doing DIY projects around for our home in Cornwall - oh, and a very neglected undertsanding fiancé ;-) 

So I've just recently received my father christmas delivery of dreamy Sizzix dies! Aren't they great?!  I can't wait to get started with them. 


I'll be posting each month here on the Sizzix blog so I do hope you'll join me for some fun project ideas! See you then!

Card box


Hi everyone
Today i will show you a card box and a Card. I have used Sizzix Thinlits Die Set 10PK - Be Thankful  and Sizzix Thinlits Die Set 8PK-Butterflies, Intricate


Items used:
Supply list:
Paper: Inkido-Beautiful-, Studiolight-Industrial-,Reprint,lace cake doily, gesso, 3D foam


How to make:
To the box i used a cardstock 14x12cm and one 14,2x12,2 cm scor 2 cm all around the edged. To the card 16x10 fold so you have a card base 8x10 cm. Cut patterned paper in 3 different size, glue together using 2 d foam and paint using gesso. Die cut the Sizzix dies and decorate the card and the box.


Thanks for stopping by, wish you a great and creativ week
Pia

Hej alle
I dag vil jeg vise en boks med tilhørende kort. Jeg har brugt Sizzix Thinlits Die Set 10PK - Be Thankful og Sizzix Thinlits Die Set 8PK-Butterflies, Intricate
Sizzix dies jeg har brugt:
Andre materialer:
Papir: Inkido-Beautiful-, Studiolight-Industrial-,Reprint,kageserviet, gesso, 3D foam,  pontura paint
Fremgangsmåde:
Til æsken har jeg brugt karton 14x12cm og et på14,2x12,2 cm scor 2 cm hele vejen rundt. Til kortet har jeg brugt katon på 10x16 cm, foldet det så du har en kort base på 8x10 cm. Udstans de forskellige sizzix die, skær mønstret papir i 3 forskellige størrelser og lim dem sammen med 3 d foam og mal det hele med gessso. Dekorer æske og kort.
Mange tak fordi du kiggede forbi, jeg ønsker dig en fantastisk og kreativ uge
Pia

Layers with Lilith

Hi there. It is Tuesday which means inspiration from me, Lilith. Today I wanted to show you a simple layout with lots of layers. I used different products from sizzix, each of which adds extra detail to the page. 
I used a scrap piece of white cardstock and the smile embossing folder from the Smile & Plus set. I added some splashes of mist to draw attention to the detail of the embossing. You could also use watercolours and go over the embossed areas.
Then I stamped with a stamp from the Hello Framelits Die Set with stamps and cut it out using the die. I also cut out some leaves from the Tim Holtz collection which I coloured with green and blue tones using watercolour paint. 
Then I layered the different elements adding embellishments along the way. I love how the cluster of papers and the photo just pops off the layout. To create flow and movement I decided to incorporate a couple of buttons and enamels dots. 


Sizzix products:

Other: Inks and mist, Studio Calico patterned paper, Studio Calico buttons, Glitz Design Finnley embellishments, doily, American Crafts kraft tag,

Have a wonderful day and see you next week with another crafty project. 

Lilith 


Monday 29 September 2014

Blackboard Elements Frame


I have been wanting to do this idea for a while, but I couldn't find the right product. Then, on a lazy Sunday in Brighton I found the decal blackboard material in a kitchen supplies shop and then I realized I didn't look for the right words! Blackboard Vinyl thats what I should have looked for!


Anyway, I found it as well as some coloured chalk, a deep IKEA frame and with two of my new dies sets, the Sizzix® Framelits™ Fancy Cards 659967 and Oval Cards 659968.

The Fancy and Oval cards are designed to fit pocket scrapbook protectors as they are just under 3 x 4" but they are useful for so many different things, like this project.


The vinyl is thin enough to die cut with Framelits as it is just about a card thickness wise. I die cut two of the largest ones and two of the smaller ones (no smallest). I cut some stripy paper to the same measure of the frame, which is 9 x 9".


Because of the vinyl nature, they are re positionable so don't worry to much at putting them exactly perfect. I placed the glass so it's all the way back which will leave me an edge to place the chalk.


And there you have it. A quick and simple project!

Sunday 28 September 2014

Hello Fall


Hi it's me Bente with you here today.

I used one of my new lovely dies to make a couple of seasonal cards. Fall/Autumn is upon us and we might as well do the best we can with it,...LOL! Not a Fall/Winter person myself :-)


My two cards are fairly similar as you can see, but I often like to see how colour and texture can change the appearance of a project and achieve variation with a little less effort..


I used the Leaf die with embossing folder here. It's a wonderful Bigz die and it cut through the chipboard I used for one of my leaves like butter. Before adding the leaves to my cards, I use my sewing machine to add some stitching as extra embellisment.

These are the Sizzix products I used:

Sizzix Big Shot Starter Kit (Powder Blue & Teal)

Sizzix Bigz XL Alphabet Die - Block Talk Lowercase

Sizzix Bigz Die w/Texture Fades - Layered Leaf

Sizzix Thinlits Die Set 6PK - I Heart This

Apart from this I used papers from French manufacturer Les Papiers de Pandore.


Thanks for looking in today!! :-) 

--------------------------------------------------------------------

Hej, det er jag Bente,  som vil vise dere noe nytt idag.

Jag använde en av mina nyaste dies för att göra ett par höstinspirerade kort. Hösten är här antingen vi vill eller inte och man kan väl säga att det inte är min favoritårstid... :-)

Dagens två kort är som ni ju kan se ganska likartade. Jag kan tycka det är kul att se hur små variationer i tekstur eller färg kan ge ganska olika resultat utan att kräva så mycket extra av ansträngningar.

Jag använde den fina Bigz diesen med ett stort löv och tillhörande embossingfolder . Det är härligt att jobba med Bigz diesen som skär genom de flesta material som smör! :-) I detta fallet använda jag en bit chipboard för mitt ena löv. Innan jag satte fast löven på kortet sydde jag på dom med maskin som extra prydnad.

Dessa Sizzix produkterna har jag använt:

Sizzix Big Shot Starter Kit (Powder Blue & Teal)

Sizzix Bigz XL Alphabet Die - Block Talk Lowercase

Sizzix Bigz Die w/Texture Fades - Layered Leaf

Sizzix Thinlits Die Set 6PK - I Heart This

Dessutom har jag använt papper från sen franska tillverkaren Les Papiers de Pandore.


Tack för att ni kikar inom! :-) 


Saturday 27 September 2014

"Lovely" layout by Olga

Hello all!

It's me again with a new project - a layout with my younger kid on the photo. I love create tags and use die-cut tags in my projects. So the tag I used in this project I created myself with the new die and stamped it. I also used wonderful set of dies and stamps - arrows.


 The products I used:

Sizzix Framelits Die Set 8PK - Tag Collection


Sizzix Framelits Die Set 5PK w/Stamps - Simply Lovely


Have a nice day!


Autumn Fox Faces Cushion


Some weeks ago I got a great package from Sizzix with new dies to try. Love to start a new season in this way , with  new ideas flying with new materials!!
First I did a chance to a lovely fox face  that I love it !!
This was my idea when the die came home, a nice and big cushion for autumn!!
I chose civil war fabrics . I think they are perfect for the idea I had and I like this kind of fabrics so much.


Here it is the back of the cushion with two easy clousure with strips of fabrics.


Supplies:

657609

659910

Scraps of Civil Era fabrics ( light and dark )
3"5 x 12 1/4" ( 2 Pieces ) dark fabric for the top
3.5"x 18" ( 2 pieces ) dark fabric for the top
14"x 18" dark fabric for the back of the cushion
11"x 18 " dark fabric for the back 
Fusible web
9"x 2" ( 4 pieces ) light fabric for the clousure
18 tiny buttons
18 tiny black beads
9 black bead for the fox nose


This is a very simple cushion to make. Just cut the light fabrics for the squares. Then iron the fusible web on the wrong side of the fabrics for the face fox and cut.


Sew the faces with a decorative stitch, mine is 45 in my Bernina machine. Now sew  the squares doing three rows of three.
After that, sew the sides of the cushion around with the dark  brown fabric. First left, then right and the last top and botton.
Now it´s time for the eyes and noses with buttons and black beads.


Here it is, a nice finished top.


For the back of the cushion I folded 2" the two big rectangles and sew. These are where the cushion is closed.
Press the light fabric as you can see in the pic  and sew.


Take a look to see the size where I sew the strips.


Lay these two pieces together and  right sides of the cushion to sew in the wrong side and you have finished the cushion. I hope this make  sense.
Mine is 20" x 20"
Enjoy this new season! I will decorate my home to  match the colours of the autumn. Do you do the same too ?


Hope you have a wonderful weekend!!!
Love
Mercedes

...............................................................................************************* ..................................................................


Hola a todo el mundo 


Hace algunas semanas que recibí un estupendo paquete de Sizzix con troqueles  nuevos . Me encanta empezar una nueva estación con nuevas ideas y materiales nuevos .
Primero le dí una oportunidad a la carita de zorro que me encantó.
Esta fue mi primera idea, un estupendo cojín para el otoño.
Elegí telas de la Guerra civil Americana que tanto me gustan y que creo que van bastante bien con la idea que tenía.

En las fotos podéis ver la parte delantera y trasera , que cerré con dos simples tiras de tela clarita.

Materiales :


657609

659910

Sizzix Bigz Die - Fox Face
Telas claras y oscuras para  los cuadrados y caras de zorro

9cm x 31cm ( 2 piezas )de tela oscura para el top
9cm x 46 cm( 2 piezas ) de tela oscura para el top del cojín 
35.5cm x 46cm de tela oscura para la trasera
28cm x 46cm de tela oscura para la trasera
23cm x 5cm  ( 4 piezas ) de tela clara para las tiras del cierre
Entrelela
18 botones pequeñitos para los ojos
18 abalorios negros para los ojos
9 abalorios negros para las nariz 


Este cojín es bastante sencillo. Sólo tienes que cortar los rectángulos de telas claras. Luego planchar la entretela en las telas oscuras y claras para la cara del zorro, cortarlas y coserlas a máquina.
En mi caso usé la puntada 45 de mi Bernina , un sencillo festón.
Cosí los cuadrados en tiras de tres y luego los laterales de la tela marrón oscura. Primero los de los lados y luego el superior e inferior.
Cuando acabé , cosí los botones y los abalorios para los ojos y las narices.


Ya véis cómo queda el top acabado y colgadito.
Para la trasera simplemente doblé 5 cm los rectángulos grandes y los cosí .Estas piezas son las que van en la parte del cierre.
Luego cosí las tiras para cerrar como ves en las fotos dejando una separación de 10 cm para los laterales. En la tapa superior cosí las tiras a  18 cm del borde y en la inferior a 20 cm.
Estas piezas acabadas las coloqué con alfileres sobre el top, derecho con derecho y cosí por el revés.
Mi cojín terminado  tiene una medida de 50cm x 50 cm
Espero que disfrutes esta estación. Yo ya estoy decorando mi casa a tono con el otño.¿Tú también haces lo mismo ?


Que tengas un maravilloso fin de semana
Cariños
Mercedes

Thursday 25 September 2014

Welcome back Downton Abbey


 I'm thoroughly enjoying the beautiful blue skies and late summer sun this September, but I'm also enjoying the prospect of curling up in front of the television, watching Downton Abbey, as the Autumn evenings become shorter and cooler.
So what better way to celebrate than to bring out my collection of Downton Abbey fabrics and begin a new quilt - sound of hands rubbing together in excitement!
I've been trying to decide what to make with these fabrics for ages - I've kept picking them up and putting them down - and now I've decided - so here we go -
I have a selection of Lady Edith and Lady Sybil fat quarters and have added 5 plain fabrics from the Wickerweave range from Andover fabrics - as I think all the patterns together might be a bit much'
I've used one of my favourite dies the half- hexagon http://www.sizzix.co.uk/product/658880/sizzix-bigz-die-5-half-hex but I'm going to stitch them together to create a different shape -
 
 So now I have to work out how to stitch them together - by making each pinwheel - or by creating triangles which can then be stitched quickly by machine - but this will entail careful planning - so I think I'll go and make a cup of tea and then see if I can plan the lay out - it may take a while - so you'll have to wait until next week to see how I fair!!!
Angela
 

Frame it ! by Karine


Hello!

Here is a new page to remind us that the holidays weren’t so far ago after all! Colour, splashes and a background enriched with texture thanks to a “mere” Sizzix die.

Cardstock: American Crafts
Alphabets: American Crafts
Stickers: American Craft Dear Lizzy
Labels: Ephéméria
Spray ink: Scrap Plaisir, Tattered Angels
Inks: Chalk Prima
Stamps: Kbox Scrap Plaisir, Aladine, Hero Arts, American Crafts
Masking Tape

Die:

658300 : Sizzix Big Shot Starter Kit
658222:  Sizzix Originals Die-Frame-Ornate #2

I felt like creating a page based on inks and Sizzix die cuts. I started by cutting out 4 baroque frames out of white cardstock. Those frames are stapled to my white background. They will bring texture and volume to my page.

I sprayed three colours of ink to create a luminous colourful unique background!

Once my background is dry, I printed several stamp patterns with coloured inks or black Versafine. Stamps are there to bring depth to the project; they don’t have to be printed very neatly.

Then I added a small picture, stickers and here we are!


Have a nice day,

Karine

Bonjour

Une nouvelle page ce jour pour nous rappeler que les vacances estivales ne sont pas si loin ! De la couleur, des éclaboussures et un fond riche en texture grâce à un simple die Sizzix.

Matériel :

Cardstock : American Crafts
Alphabets : American Crafts
Stickers : American Craft Dear Lizzy
Etiquettes : Ephéméria
Encres en spray : Scrap Plaisir, Tattered Angels
Encres : Chalk Prima
Tampons : Kbox Scrap Plaisir, Aladine, Hero Arts, American Crafts
Masking Tape

Die :

658300 : Sizzix Big Shot Starter Kit
658222:  Sizzix Originals Die-Frame-Ornate #2

J'avais envie de créer ici une page à base d'encres et de découpes Sizzix. J'ai commencé par découper dans du cardstock blanc 4 cadres baroques. Ceux-ci sont ensuite agrafés à mon fond de page blanc également. Ils vont apporter de la texture et du volume à ma page.

J'ai vaporisé 3 couleurs d'encres en spray pour créer un fond lumineux, coloré à souhait et unique !

Une fois sec, j'ai imprimé plusieurs tampons avec des encres couleur ou ma Versafine noire. Les tampons sont juste là pour donner de la profondeur, leur impression ne doit pas être parfaite.

Il me suffit ensuite de rajouter une petite photo, des autocollants et le tour est joué !

Très bonne journée à vous


Karine

Wednesday 24 September 2014

Birthday tags by Olga


Hello all!

Here are my new tags with the news dies I got some time ago. As many of you know I'm a real "leaves fan")) I like any kinds - printed, died or handmade. But this time I finally got a wonderful set of dies from Sizzix - 13 leaves in a set! 13 variants to any taste!)) So I've created 2 tags and used 2 kinds of leaves dies. I've also painted them with watercolor to make them look more natural.


The products I used:

Sizzix Thinlits Die Set 13PK - Leaves, Garden

Sizzix Originals Die - Flourish, Beautiful


Have a nice day!